
The Darkroom
|
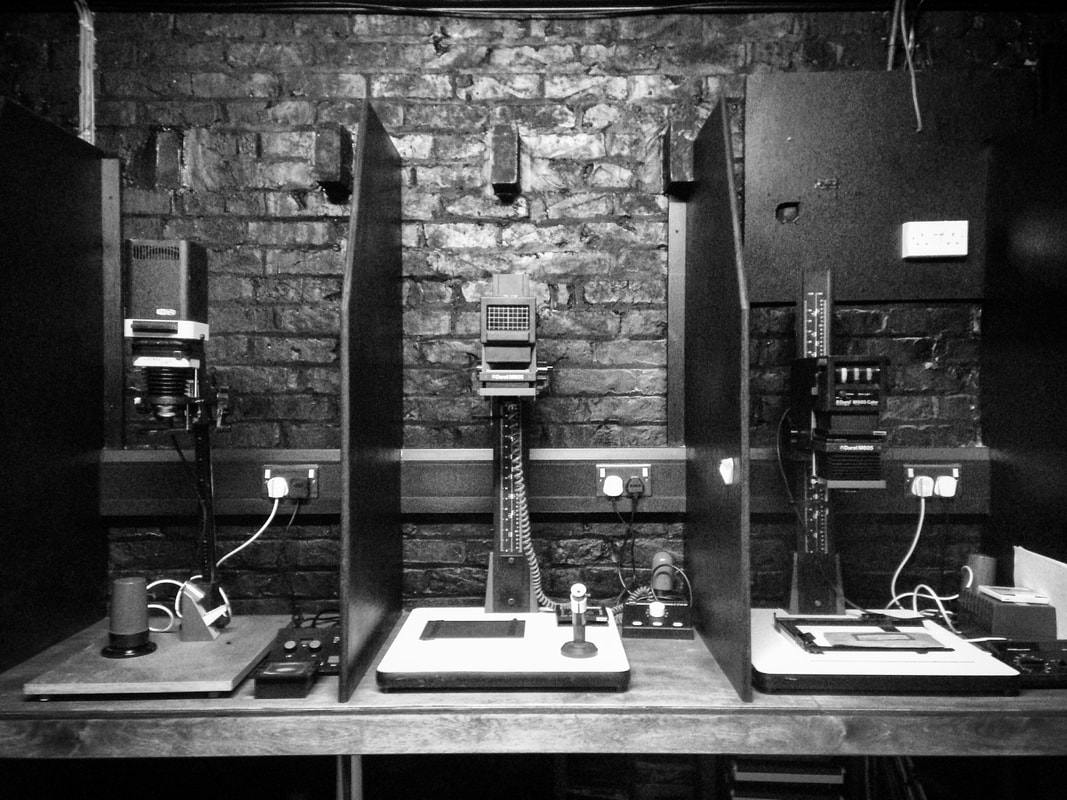
A darkroom is a workshop used by photographers working with photographic film to make prints and carry out other associated tasks. It is a room that can be made completely dark to allow the processing of the light sensitive photographic materials, including film and photographic paper. Various equipment is used in the darkroom, including an enlarger, baths containing chemicals, and running water.
Darkrooms have been created and used since the inception of photography in the early 19th century. Darkrooms have many various manifestations, from the elaborate space used by Ansel Adamsto a retooled ambulance wagon used by Timothy H. O'Sullivan. From the initial development to the creation of prints, the darkroom process allows complete control over the medium. Taken From Wikipedia.... |
|
Developing Film...
|
|
HERE ARE SOME TIPS:
|
HOW TO DO IT:
- Take hold of the cassette and your end cap remover and turn out the light. Lever the cap off the cassette and slide the film spool part way out.
- Find the film’s shaped leader, slot this through the light-trap opening and then slide the spool back. (This saves having 1.4m / 4ft 8in of loose film falling on the floor)!
- Pick up the spiral and find the projecting lugs which mark the film entry point.
- Have these lined up and pointing towards you. Grip the end of the film and pull about 5cm / 2in into the first channel between the lugs.
- Pull about 30cm / 1ft of film out of the cassette. Rotate the sides of the reel back and forth to wind the film into the spiral.
- When you reach the end of the film cut this away from the cassette spool. Give it a few extra turns to wind the film all the way on.
- Finally, put the spiral into the developing tank with its plastic sealing ring (if needed) and screw on the tank lid. The film is now sealed inside a light-tight container, so you can switch on the room lights.
Developing Contact Sheets...
*While a MULTIGRADE filter 2 produces a contact sheet of normal contrast, you may want to produce a soft contact sheet using a filter 1 or even a filter 0. This minimises the difference between the densities of individual images formed by differently exposed negatives and retains more of the detail in your pictures. With colour negatives, it is not advisable to use a filter setting lower than 2 ½. If negatives are very inconsistently exposed, try overexposing the contact sheet by 1/2 stop, then under develop. |
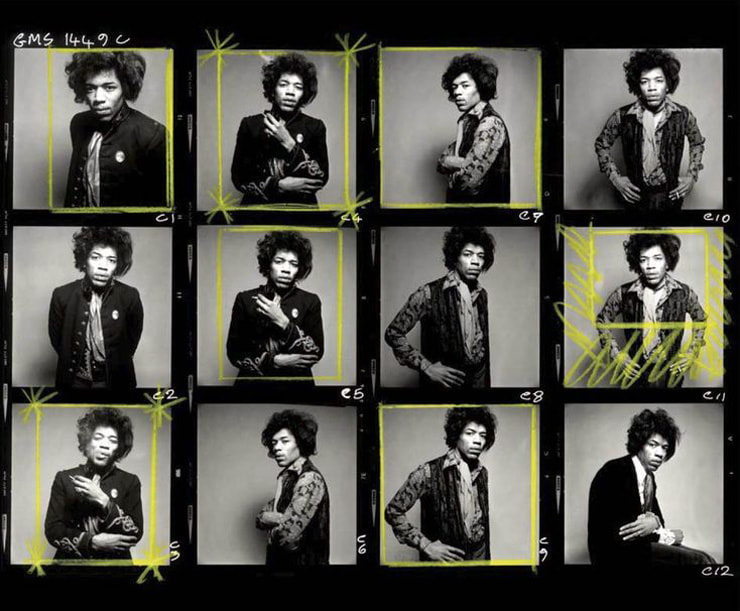
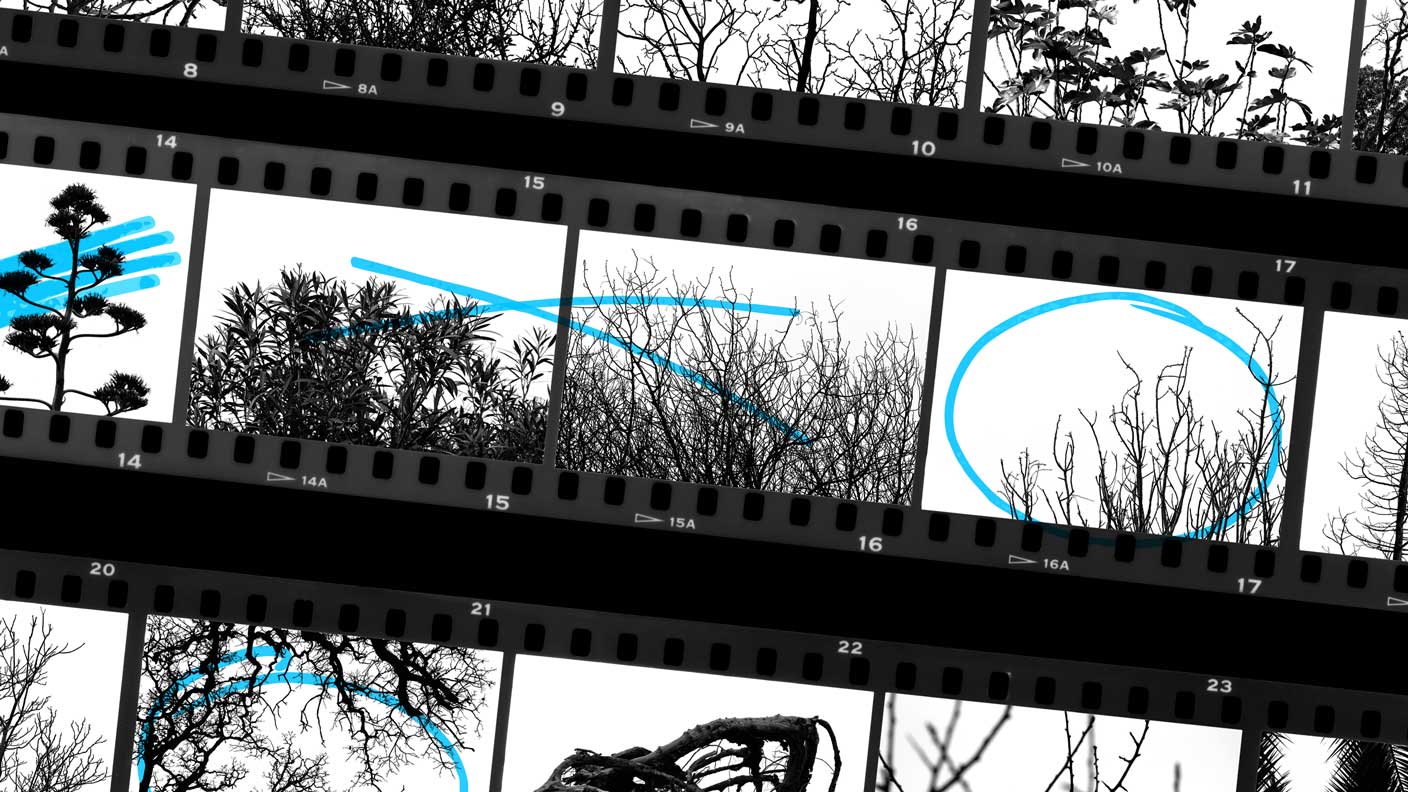
Contact sheets are a great way to review and record your images. They allow you to view all the negatives on a roll of film before deciding which ones you want to print and how you may want to crop them. They also provide a permanent record of those negatives for filing purposes. HOW TO MAKE A CONTACT SHEET
|
Developing Test Strips and Prints...
|
THE FIRST STAGE OF MAKING A DARKROOM PRINT IS TO DETERMINE THE EXPOSURE TIME. If you have already created a contact sheet of your negatives, and they appear correctly exposed, then you should have a rough idea of the necessary exposure (provided you haven’t moved the enlarger head or aperture setting after exposing the contact sheet). Note: If you change the degree of enlargement you will also need to adjust the exposure. Some enlargers have scales printed on their columns to make this easier.
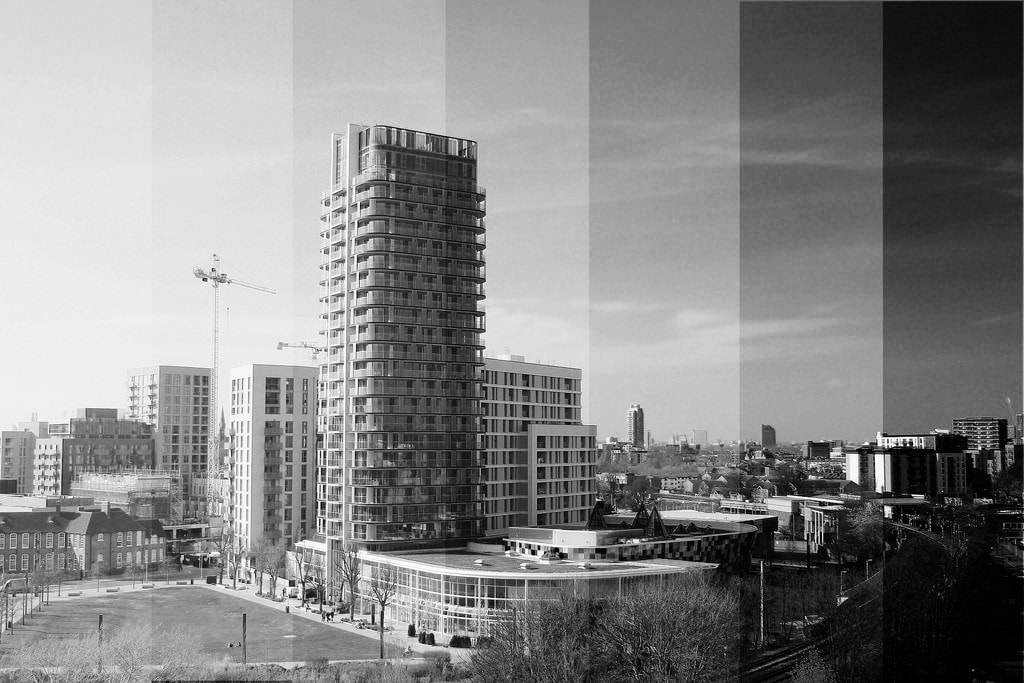
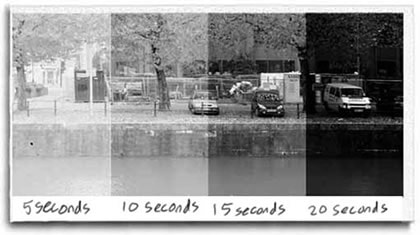
ANOTHER WAY TO DETERMINE THE EXPOSURE IS BY MAKING A TEST STRIP.The area of the negative you choose for exposure testing won’t necessarily be the centre. It should ideally contain a range of tones that is representative of the negative as a whole. If |
|
this is impossible then pick the most important region of the picture.
The drawback of traditional exposure testing, made by progressively covering or uncovering a strip of paper during the exposure, is that each step shows a different portion of the negative. A better method is as follows:
|
|
Creating Black Borders...
|
A black border often enhances a print and does not involve any sort of mounting or overlay. INK OR TAPE BORDERSThe easiest way to produce narrow black borders is to rule them with a pen directly onto your finished print: an India-ink pen gives the most solid line, but most permanent (all surface) spirit based markers are much less expensive and will do the job. For slightly wider black borders, narrow, self-adhesive strips are available from graphic arts suppliers. Supplied in dispensers, of various widths and in a variety of colours including black and white. The tape is an easy way to create borders of consistent width, with clean edges and sharp corners. |
PRINTING BLACK BORDERS
If you want wider black borders, a good way to produce them is by fogging the paper with light from the enlarger. Here is how:
- Place a sheet of paper in your masking frame so that a strip the width of the borders you want is covered evenly by the masking frame on all four sides.
- The area remaining in the centre will be the picture area and you now need to cut a piece of card to fit this area exactly.
- The easiest way to do this is to insert a sheet of card underneath the masking frame (slightly larger than the exposed area) and draw around the opening with a sharp pencil.
- Remove the card and cut it carefully to the size of the pencil markings, making sure that the edges are perfectly straight and the corners neat.
- When you are ready to print, place a piece of unexposed paper into the masking frame and position the rectangle of card in the centre.
- Place a heavy weight such as a large book onto the card and lift away the masking frame.
- With no negative in the enlarger and using a MULTIGRADE filter 5, expose for the shortest possible time required to produce a solid black. The time required will depend on print size, enlarger type and lens aperture, so you will need to perform an exposure test before you start.
- Having exposed the “borders”, replace the masking frame, remove the card and print your picture in the central area of the paper.
information taken from Ilford Website