
Movement and PhotographyPhotographs, by definition, capture and immortalize a small slice of life. There is little for the viewer to infer what happens before or after that moment. However, there are images that need to communicate motion. For example, you may want to capture a dog running, a train barreling down the tracks, or trees that are blowing in the wind. Each of these scenes can come alive within your photographs if you learn how to convey motion properly.
For this project you are going to learn new skills and increase your understanding of the wrtten element of the work required and start to see how an project will come together. |
|
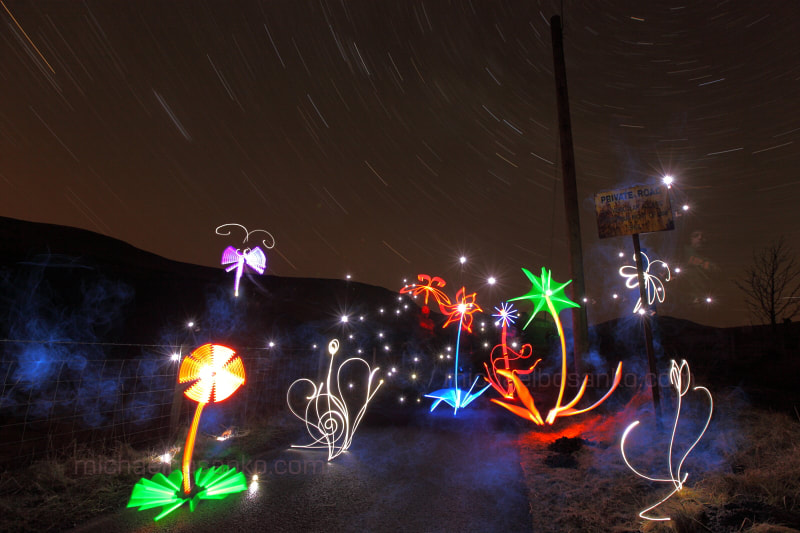
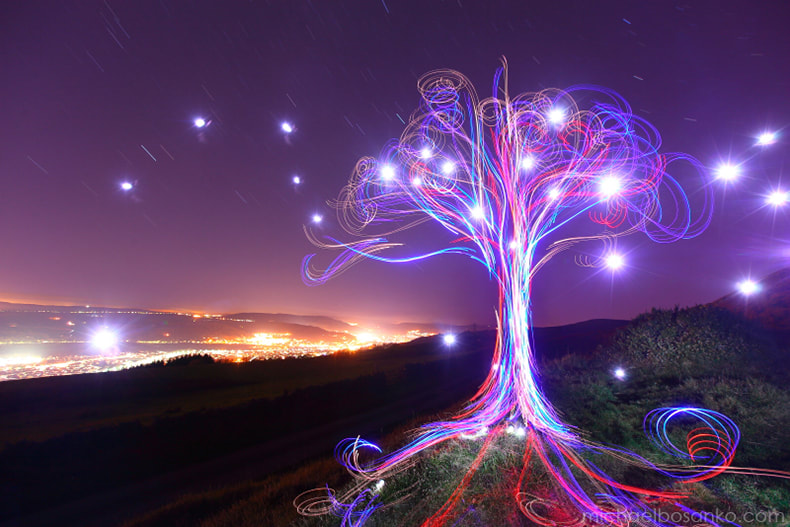
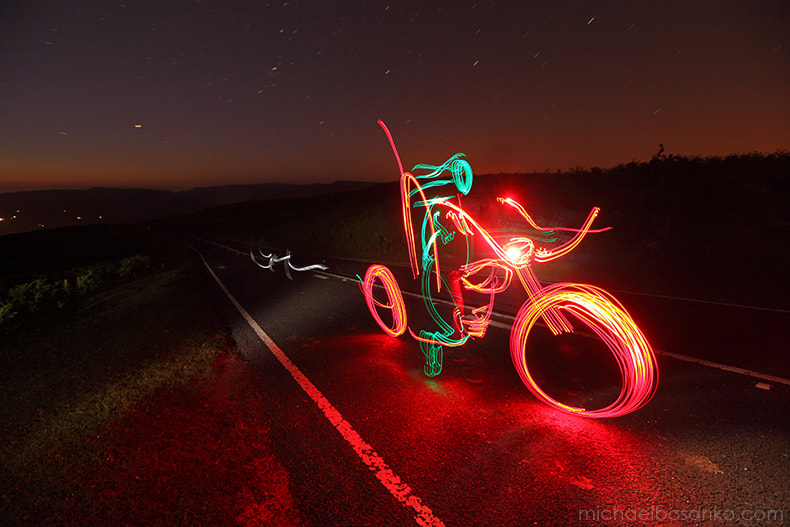
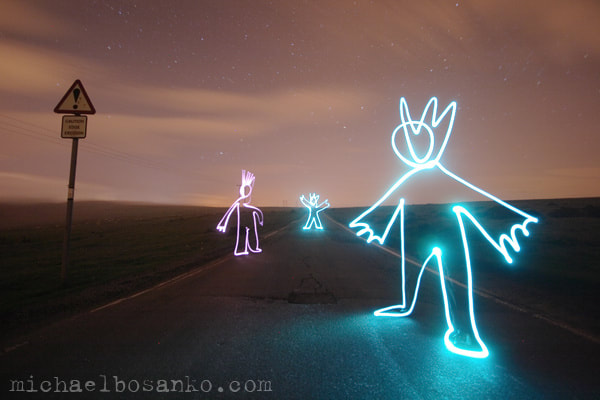
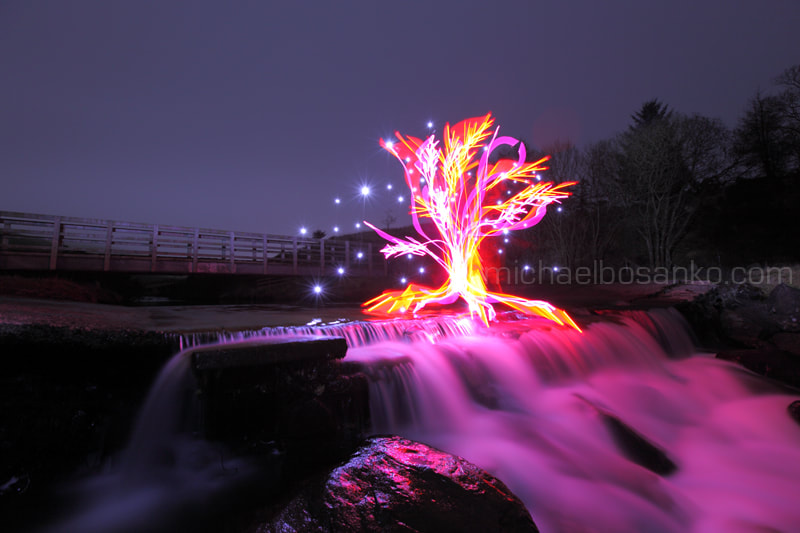
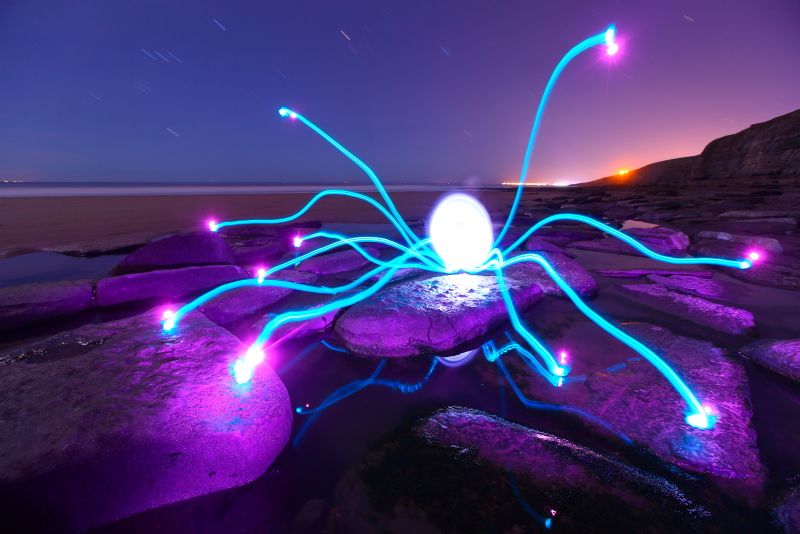
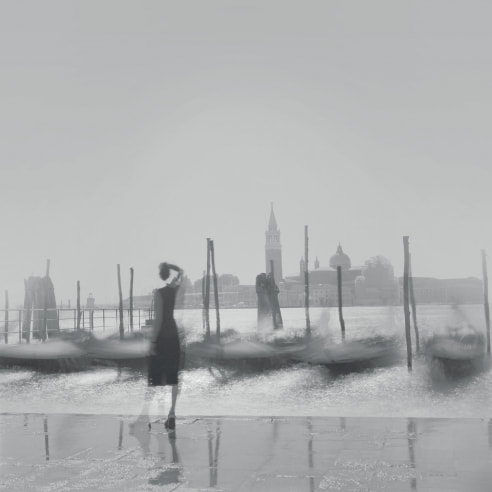
Michael Bosanko
|
|
|
|
|
|
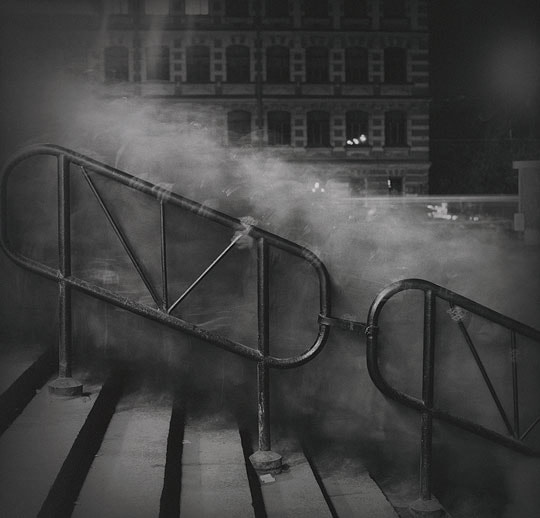
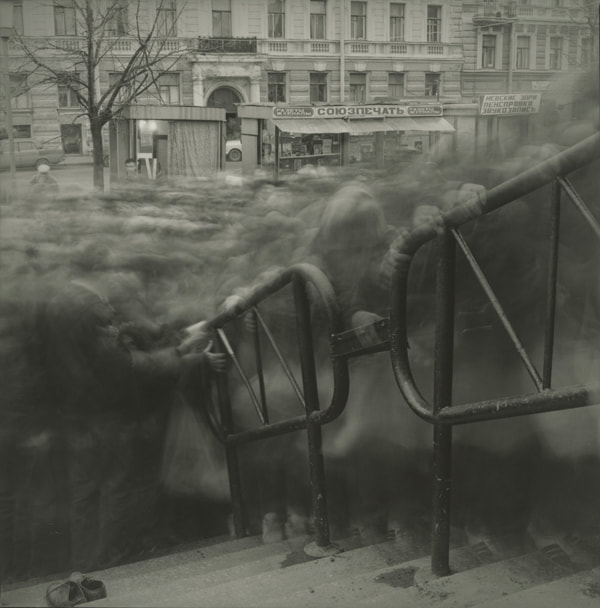
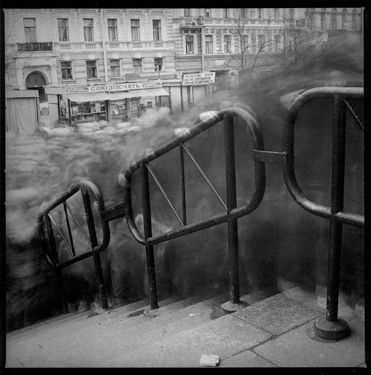
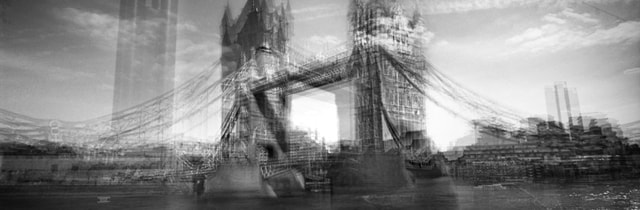
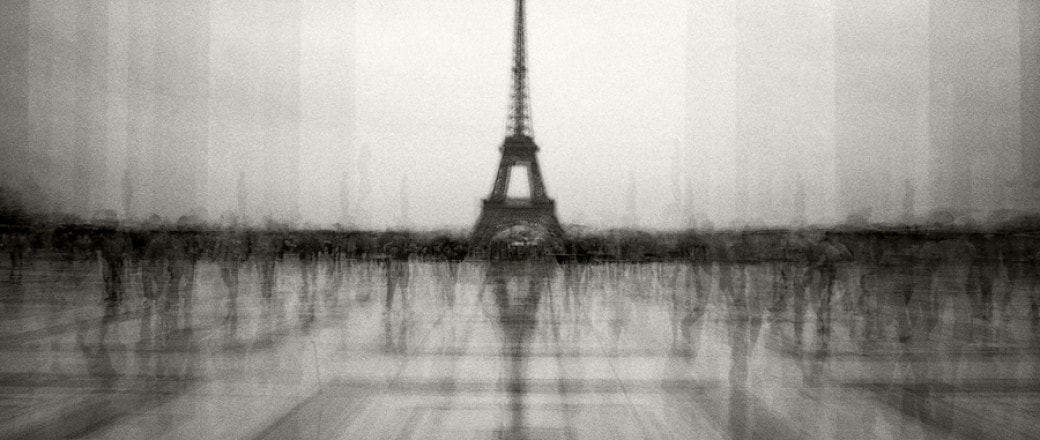
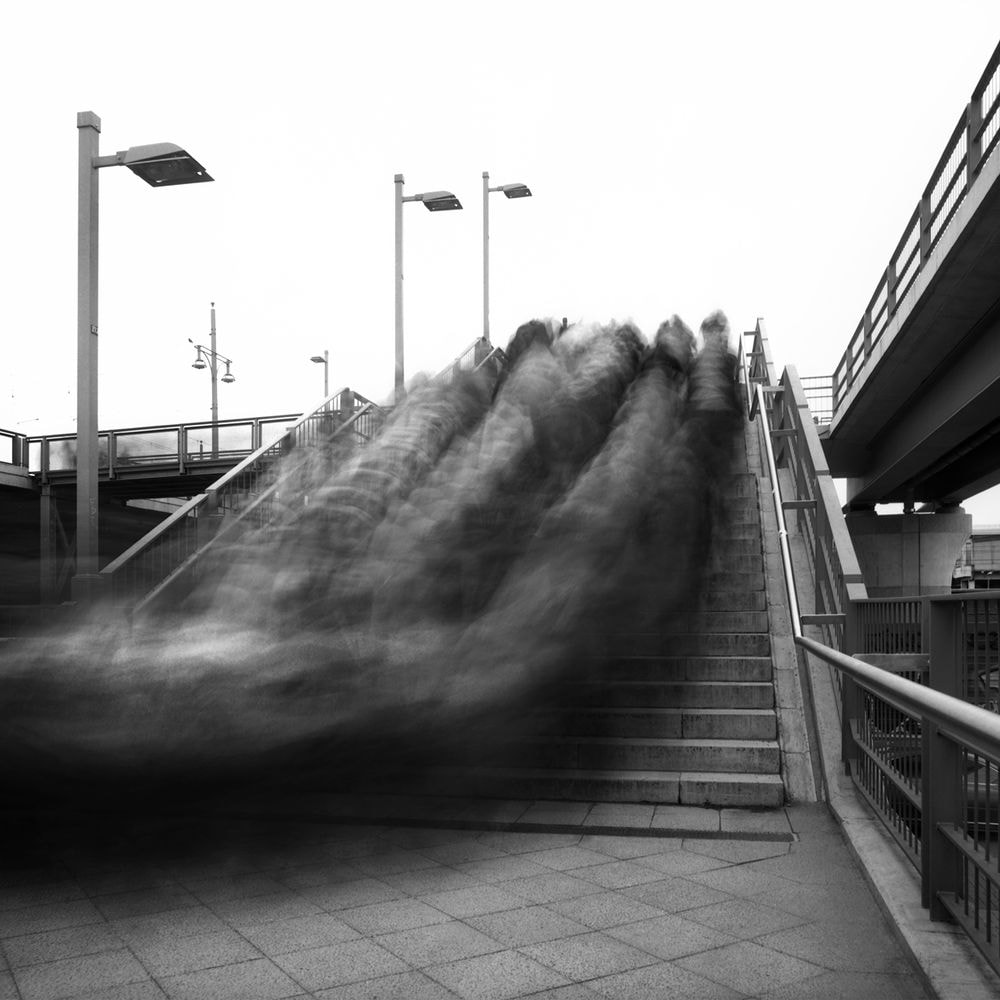
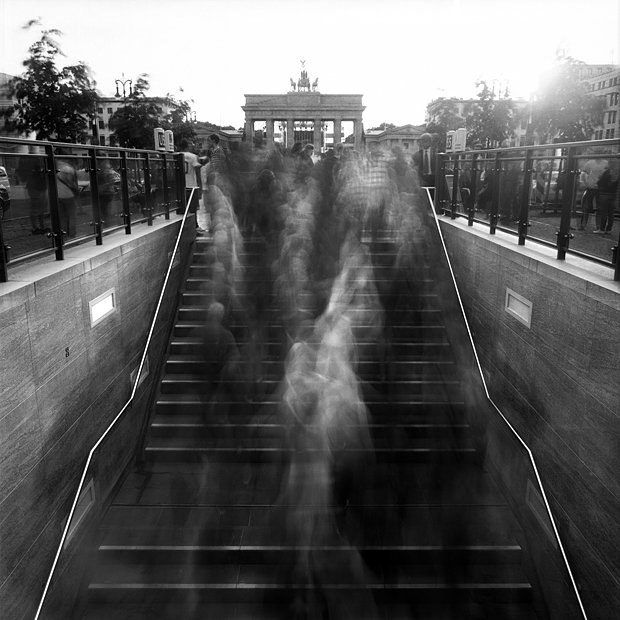
Alexey Titarenko
|
|
|
|
|
|
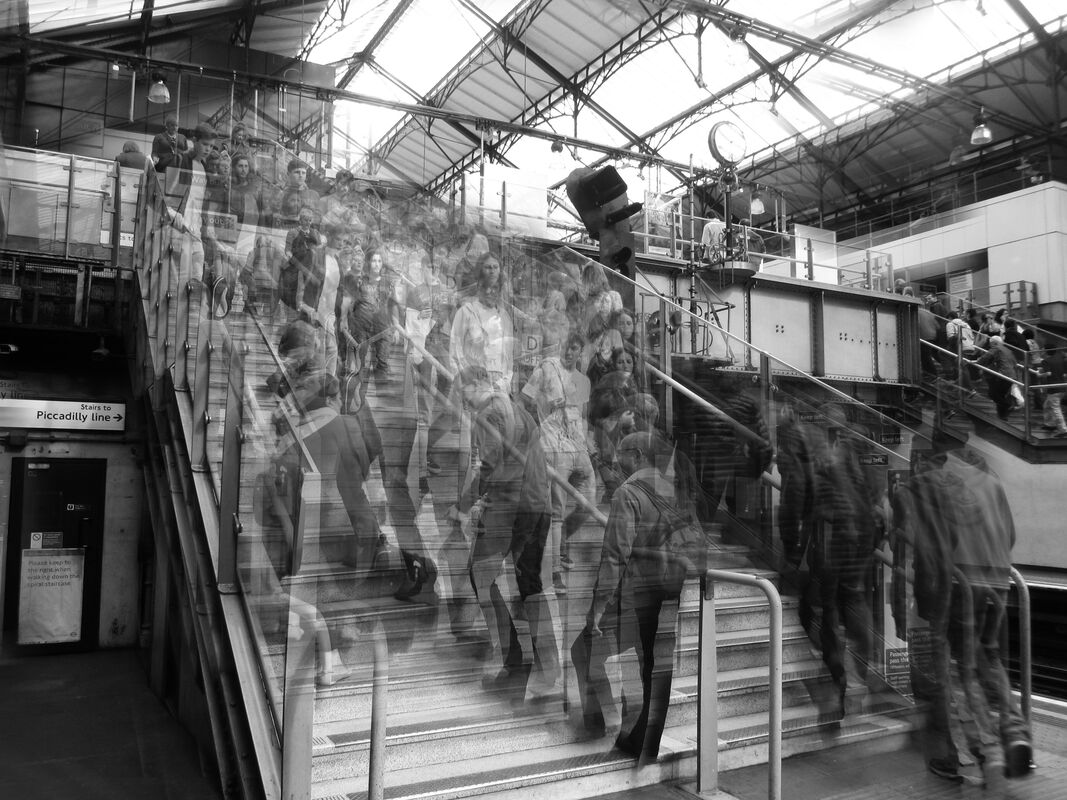
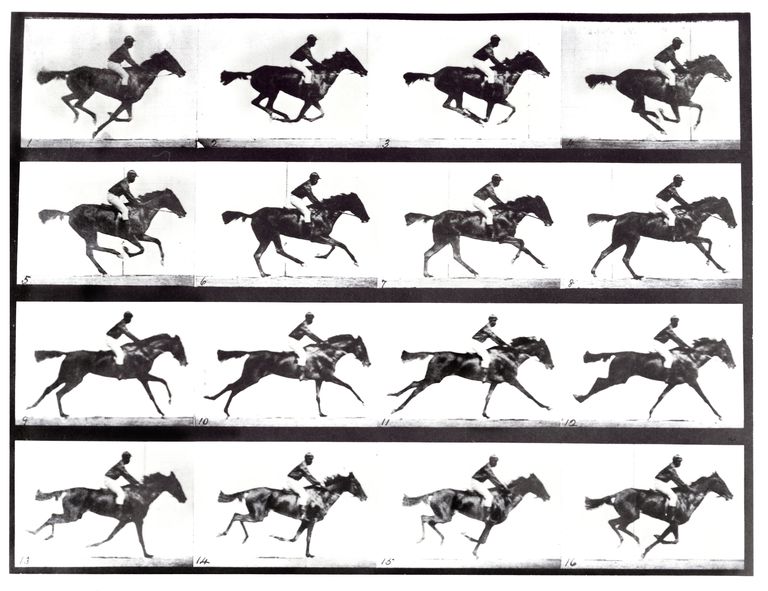
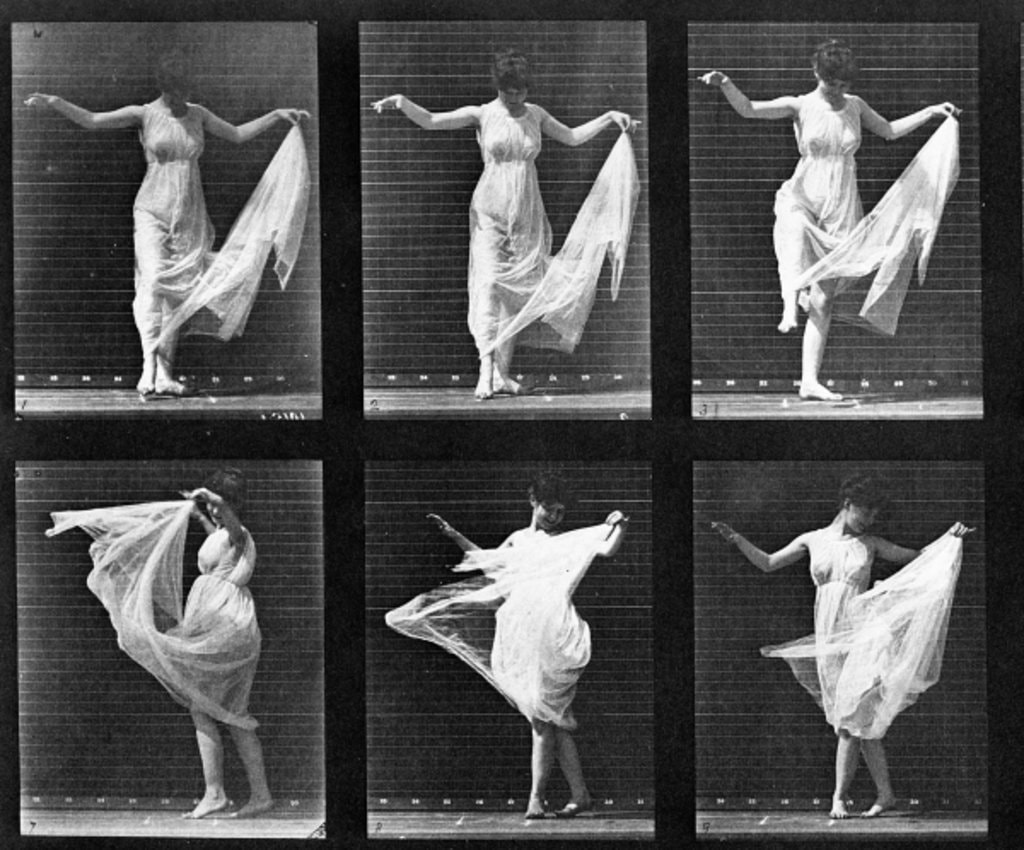
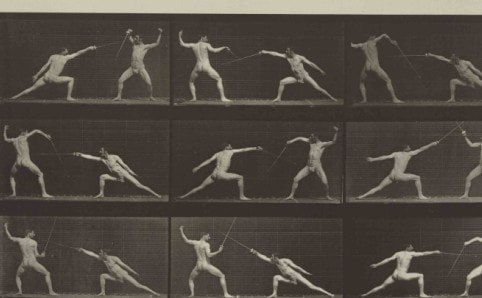
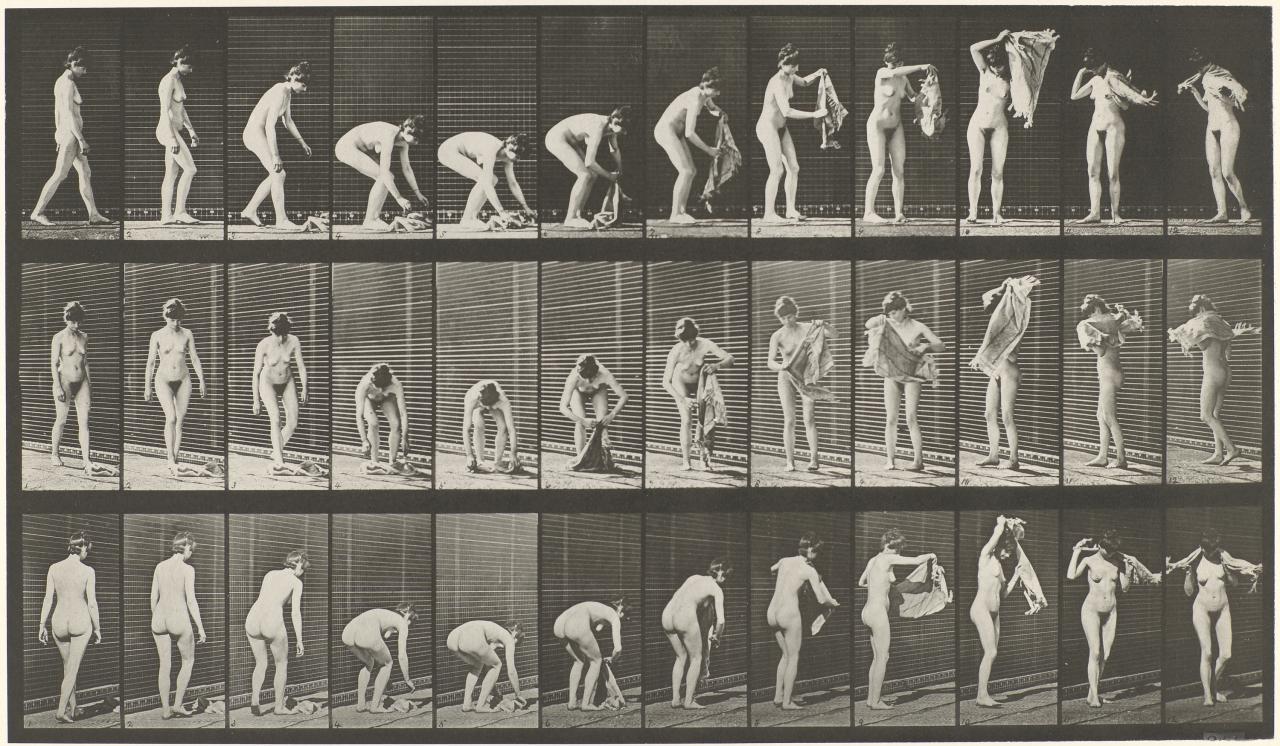
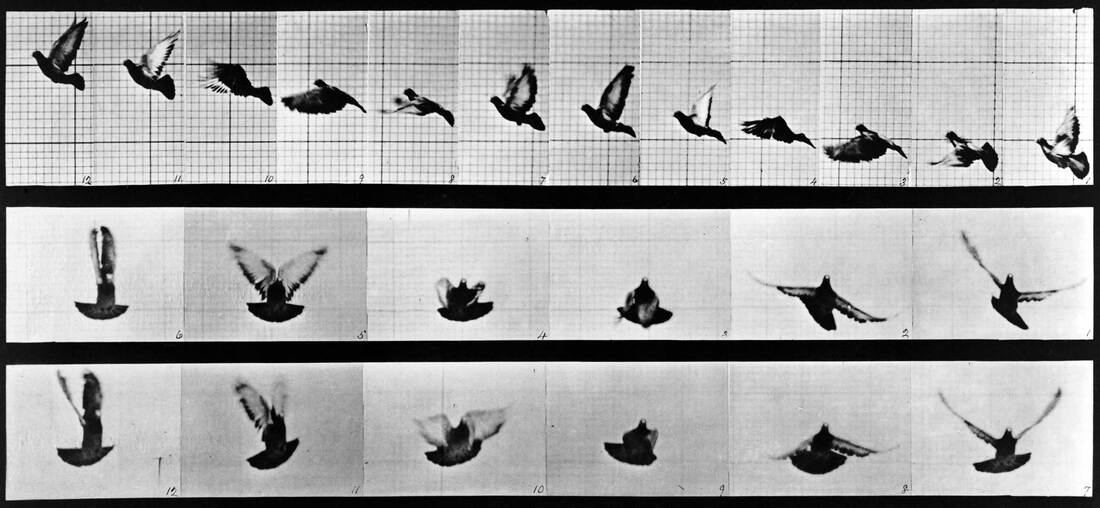
Eadweard Muybridge
|

|
|
|
|
|
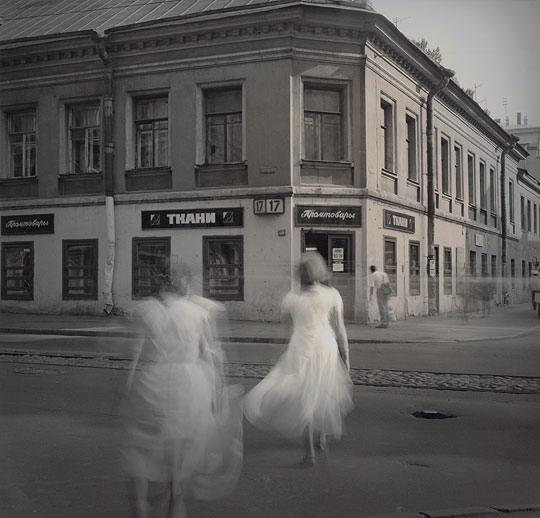
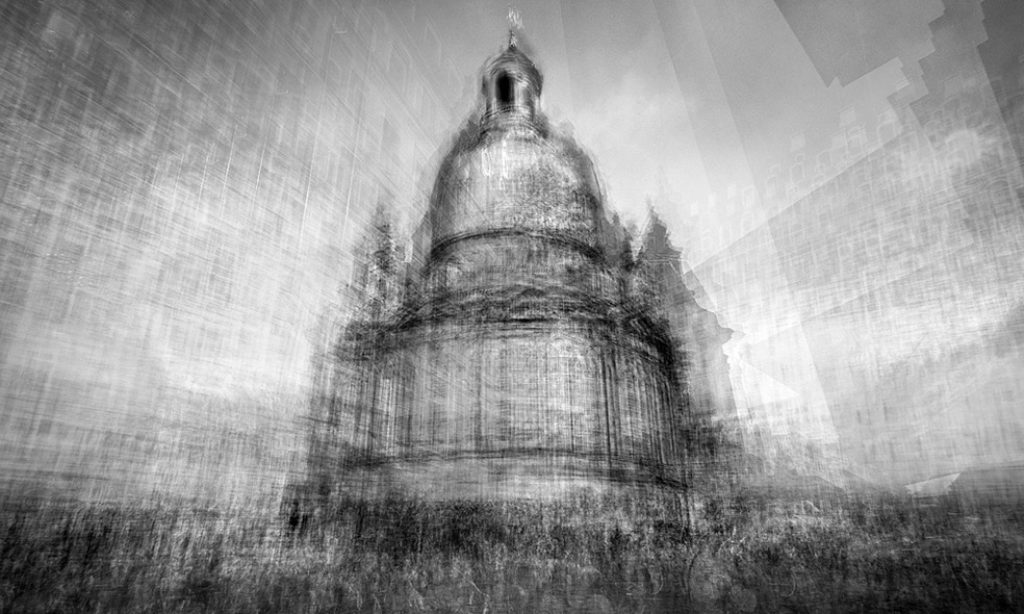
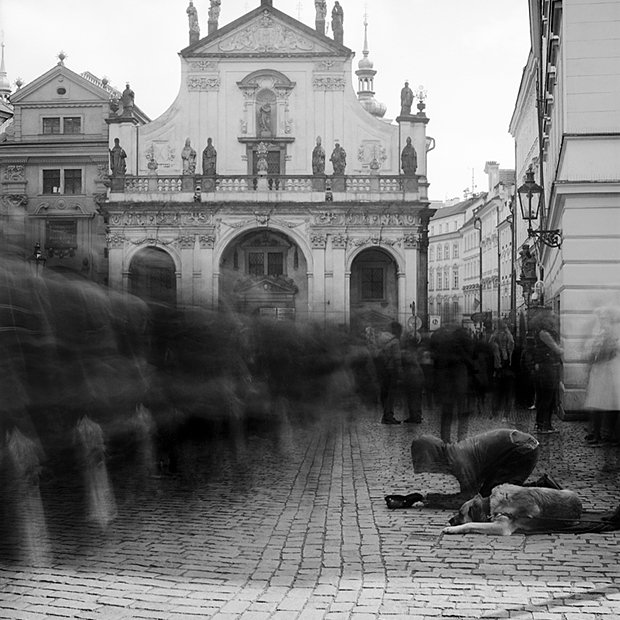
Frank Machalowski
|
|
|
|
|
|
How to set your camera...
|
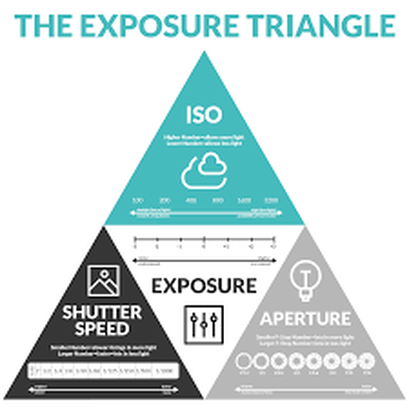
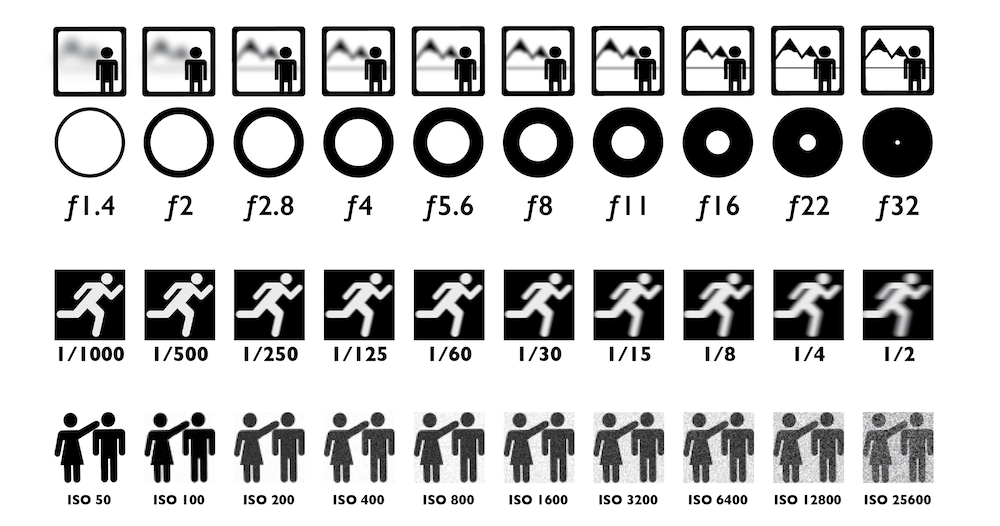
In order to make sure that your camera is set properly for your images you will have to look at 3 different areas; The Aperture, The Shutter Speed and The ISO. This is know as the Exposure Triangle. The three elements have to work together in order to get an image taken with the correct exposure.
The Aperture is the opening in the lens that allows more or less light through and has a direct effect on the depth of field. The Shutter Speed is how fast the image is taken and how fast the shutter works, exposing light on to the digital plate. The ISO is the cameras sensitivity to light, the darker the enviroment the higher the required ISO so that the image can be exposed properly. Below you can see using the chart how the three elements work... |
|
Things to remember...
|
A wide open aperture has a smaller corresponding number and produces a shallow depth of field. A closed down aperture has a larger corresponding number and produced a longer depth of field.
|
Remember that the shutter works from fractions of seconds to while seconds in some cases from 1/4000th of a second to a full 30 seconds. The faster the shutter works the camera can freeze time and the slower the shutter the more likely you are to have motion blur or movement in your image.
|
The ISO is there to help your camera react properly to different light situations. The darker the available light the higher you can set your ISO to help your camera be more responsive; however be aware that the higher the ISO the grainier your image will appear.
|
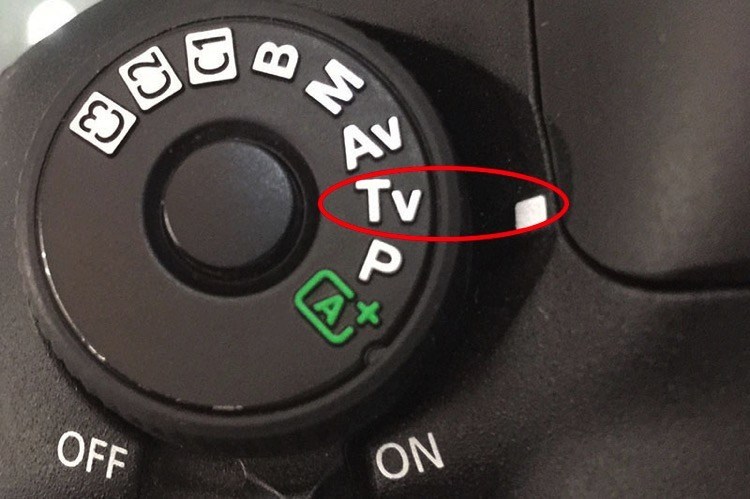
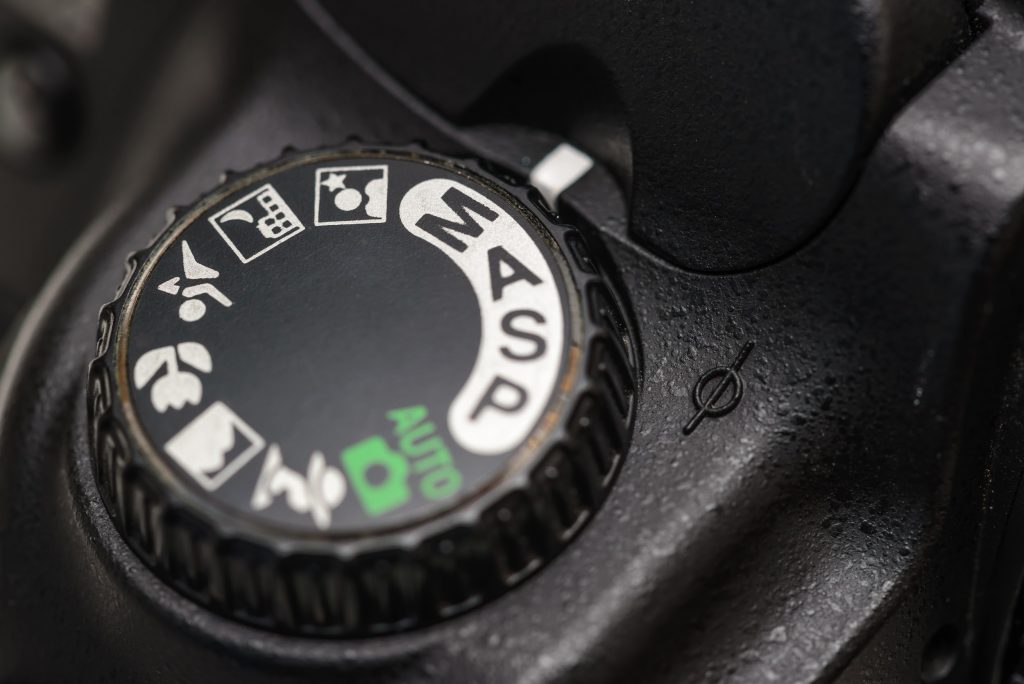
You can set your camera in 2 different ways. When you have time on your side you should set your camera to Manual (M). This will ensure that you have the best control over the camera and will ensure that you can set the aperture, shutter and ISO to whatever you want them to be. If you need to take the image quickly, because the event is going to pass too quickly, you could use the Shutter Priority (TV or S) setting. This will allow you to set the shutter and gives control over the ISO and the Aperture back to the camera. Be aware that this can result it the depth of field not being what you want it to be.
|
|
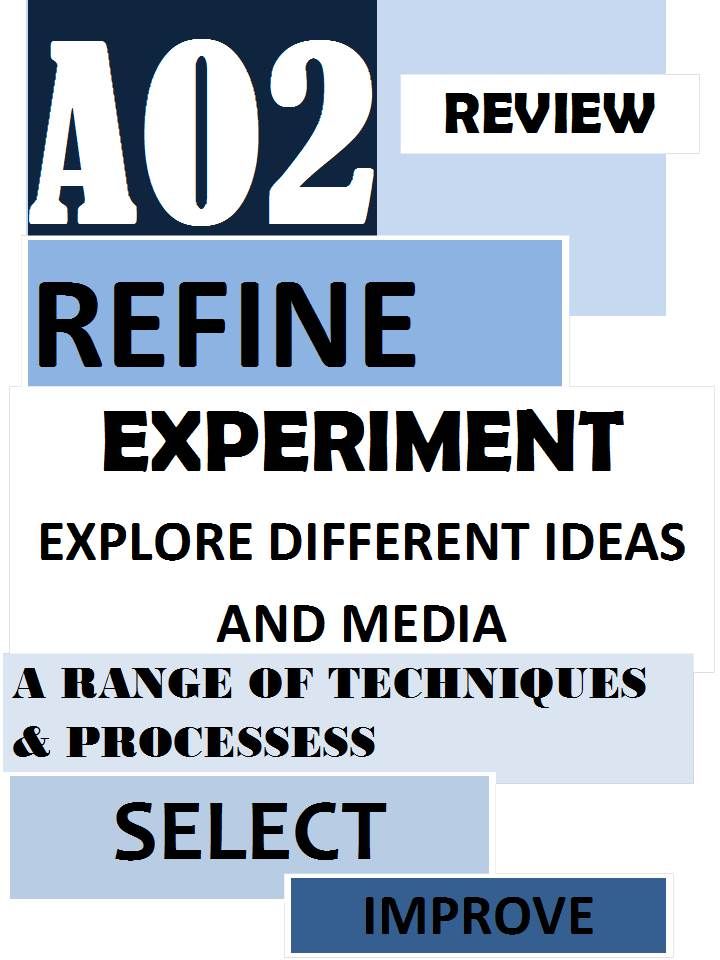
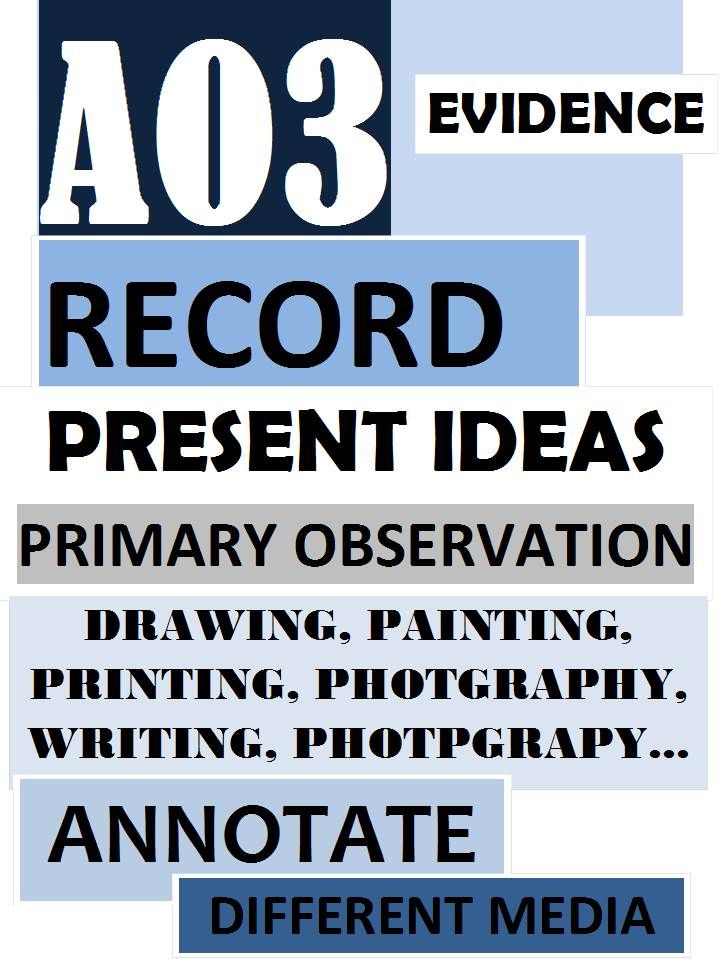
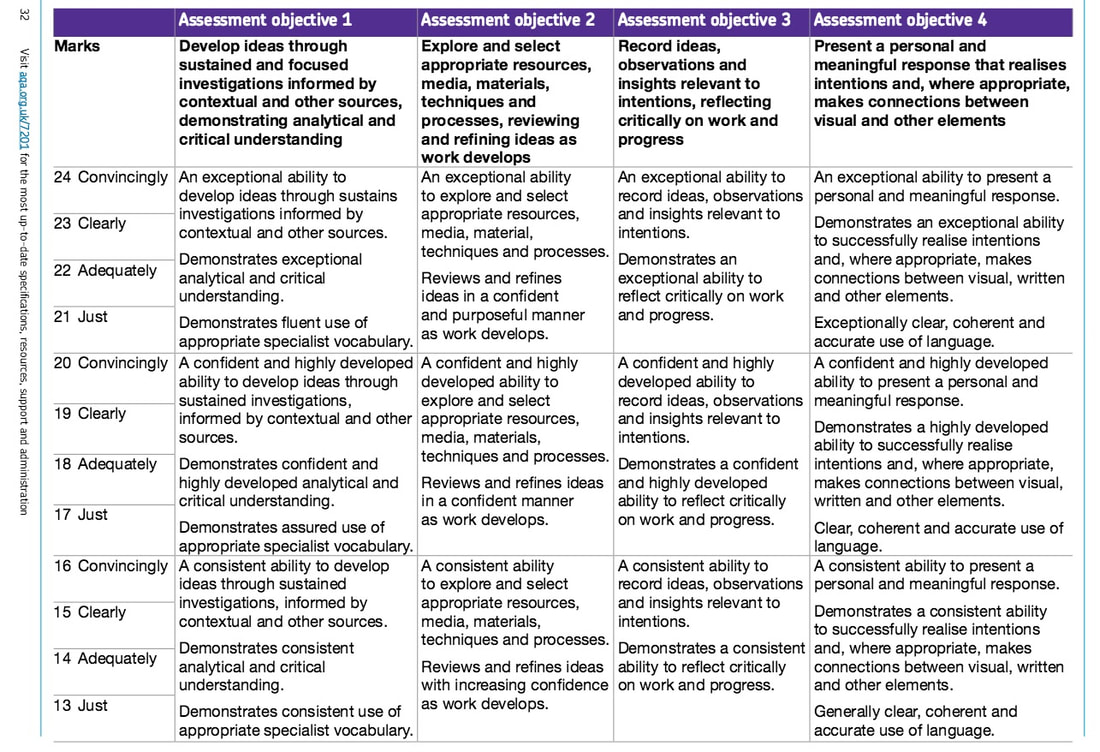
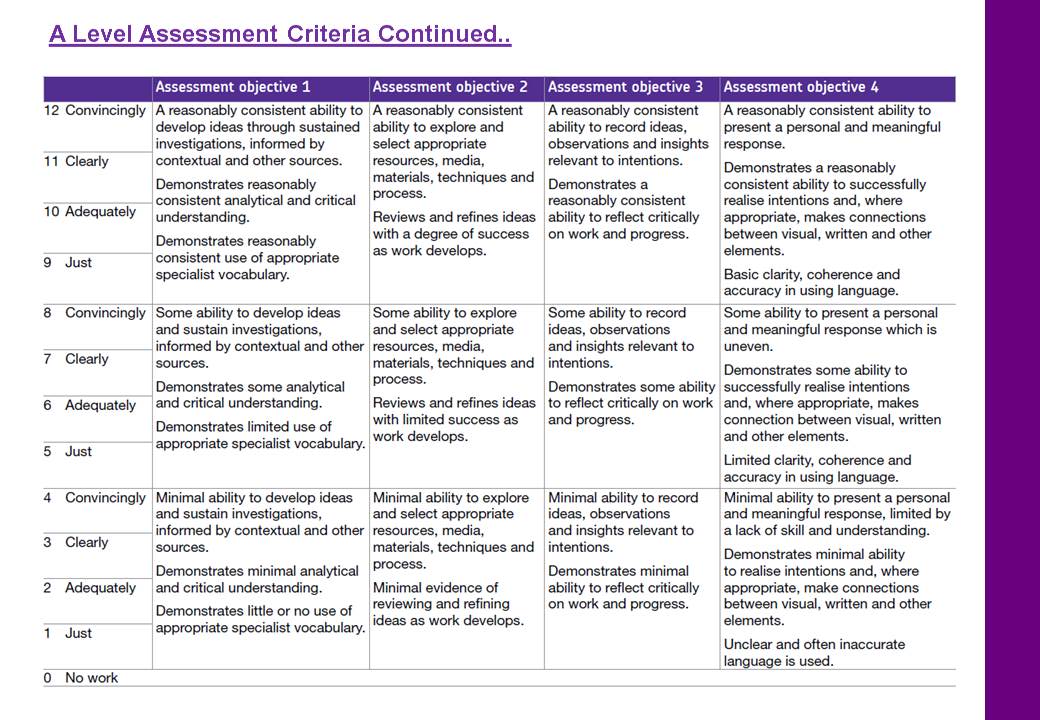
Assessment Objectives...
|
|
|

|
The assessment objects (AOs) are set by the examination board. Each of the AOs has its own elements that you have to cover and each is worth 25% of the overall mark.
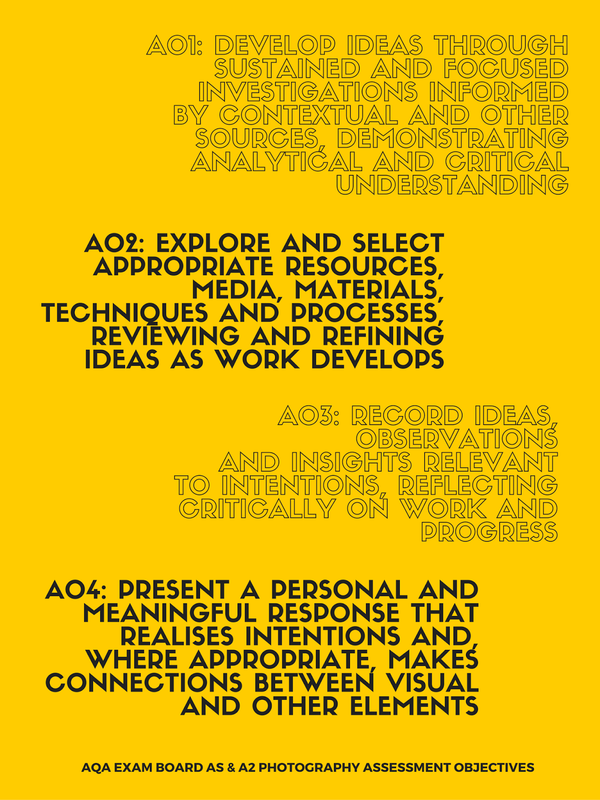
You can find more information on the AQA website by clicking HERE
|
|
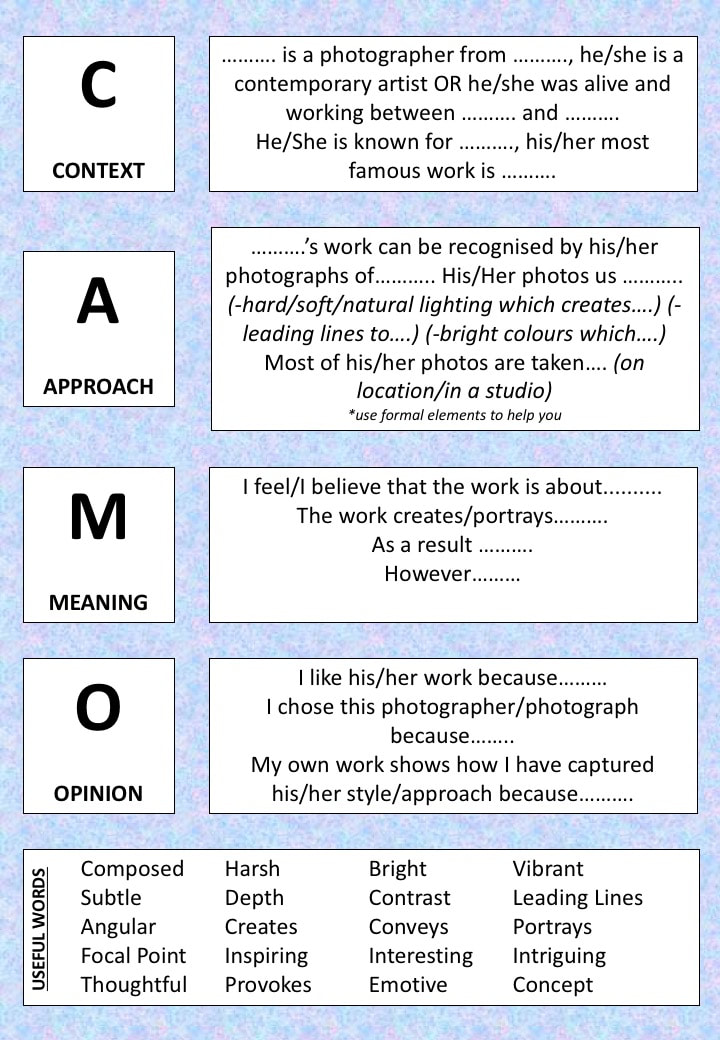
Artist Studies (AO1)...
Below is a help sheet to assist you with producing an artist study. Using the questions below and by doing research you are here able to show your understanding of the artist work and your interpretation of what you take from that artists in order to produce your own work. Remember that you shouldn't just have to reproduce exactly what the artist does in order to take inspiration from the artist. You are welcome to do so but you must also put your own flare on the work and make sure that you get the best marks.

If you struggle with writing you could use these alternative help sheets. These help sheets will not effect your ability to get a higher mark so wither help sheet is ok to use.
|
Things to remember...You have to talk a little about the photographer themselves
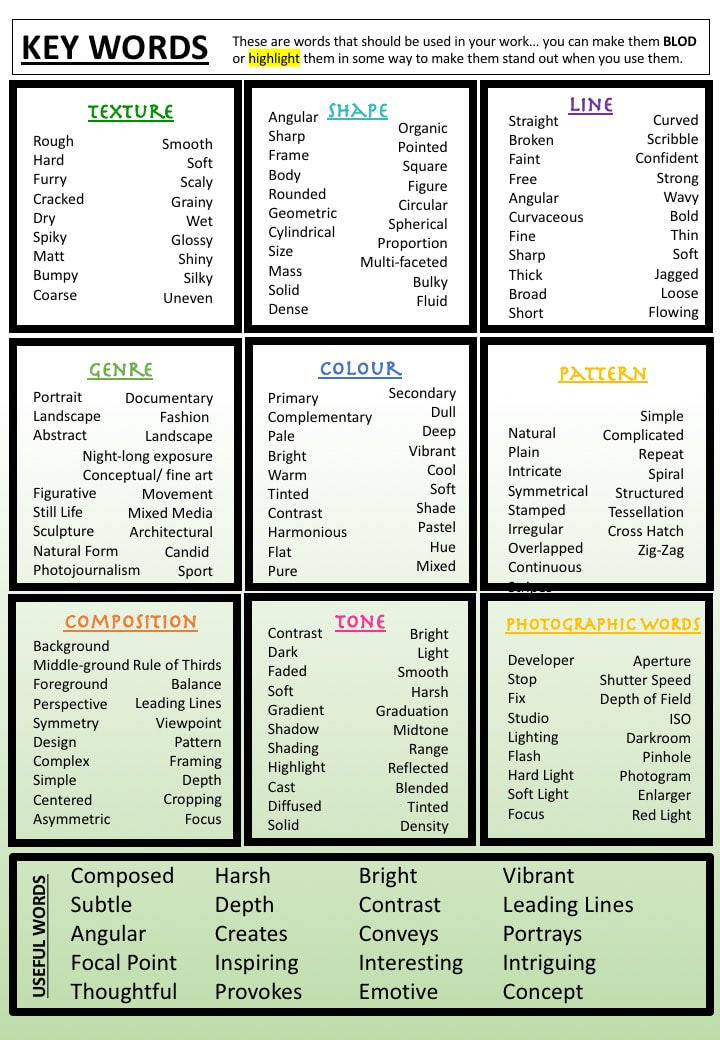
You have to show your understanding of the work and why the artist has chosen particular approaches. You must include your personal opinion of the work. You must analyse the work of the artist you are looking at and show your understanding and interpretation of particular pieces of work by that artist; we are looking for 1, 2 would be better. That is a minimum. You must include the right terminology. there is some below to help you. |
What your artist studies could look like...
Remember that you need to make your work look visually appealing and exciting to look at.
|
|
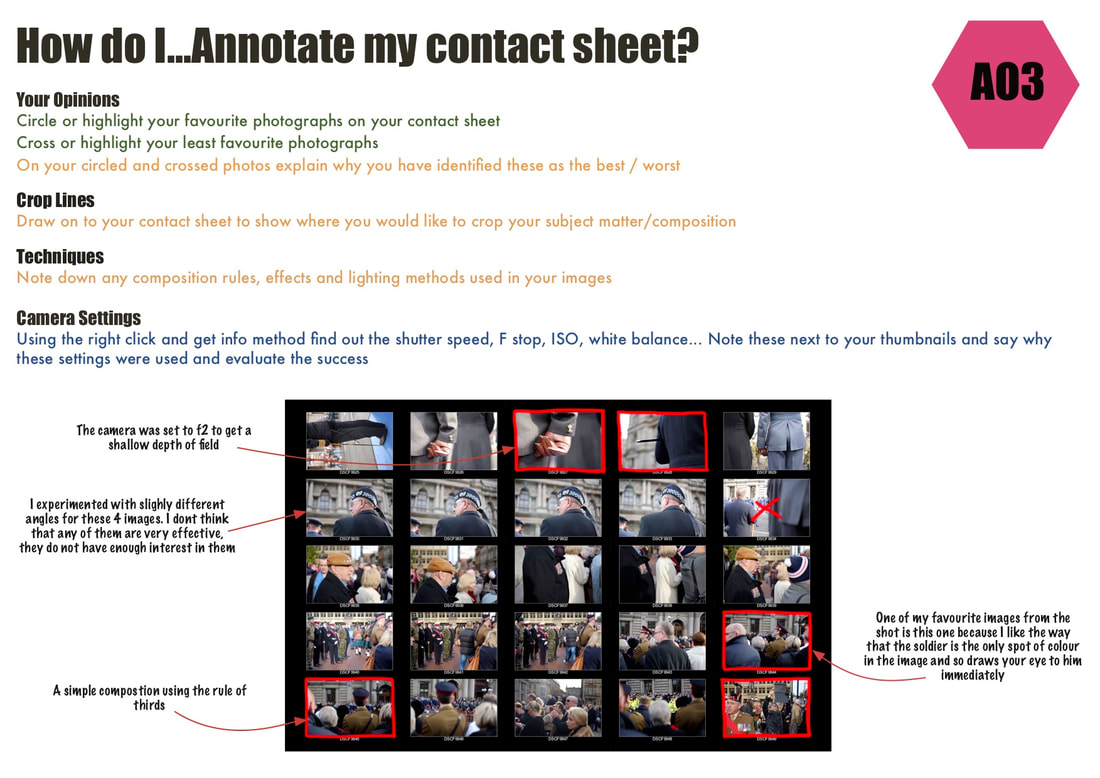
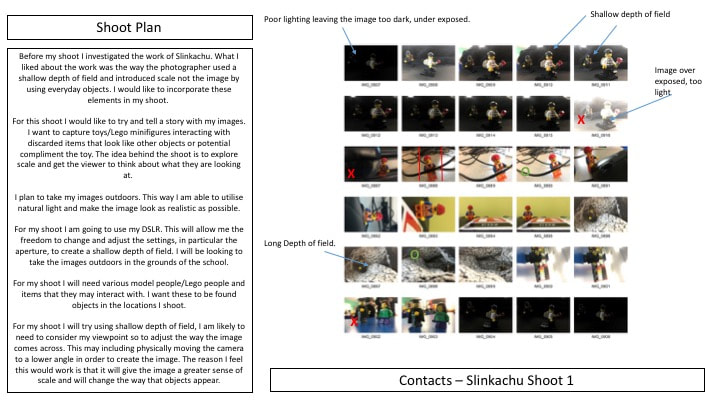
Shoot Planning and Contact Sheets...
As part of AO3 you are required show that you are planning the shoots you intend to take. Below is a help sheet that can use in order to help you out with the structure. The shoot plan is followed by your contact sheet. A contact sheet is a display of all the images you have taken for your shoot. You should always shoot a minimum of 30 images per shoot. Below you will find a guide to making a contact sheet.
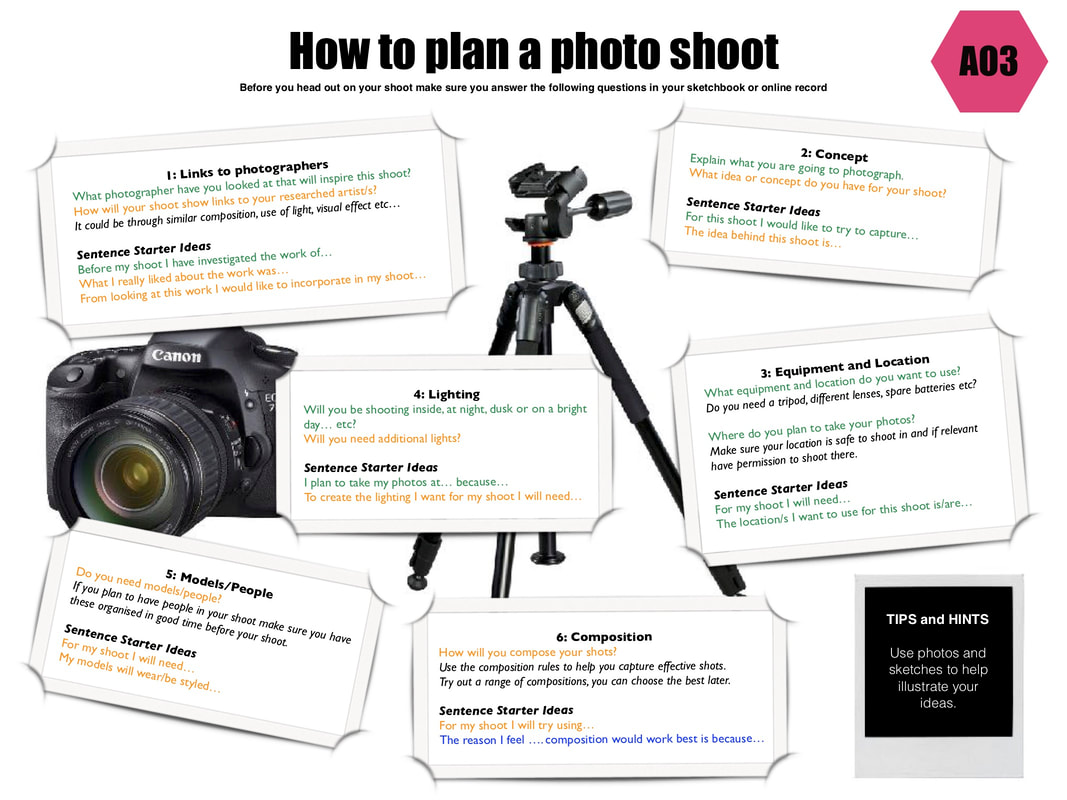
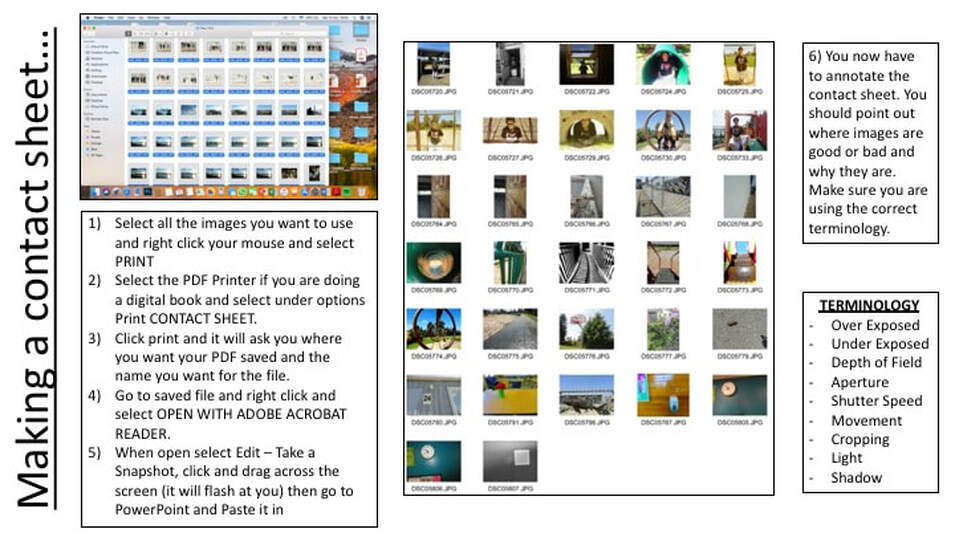
Below is an example of how your shoot plan and contact sheet may look...
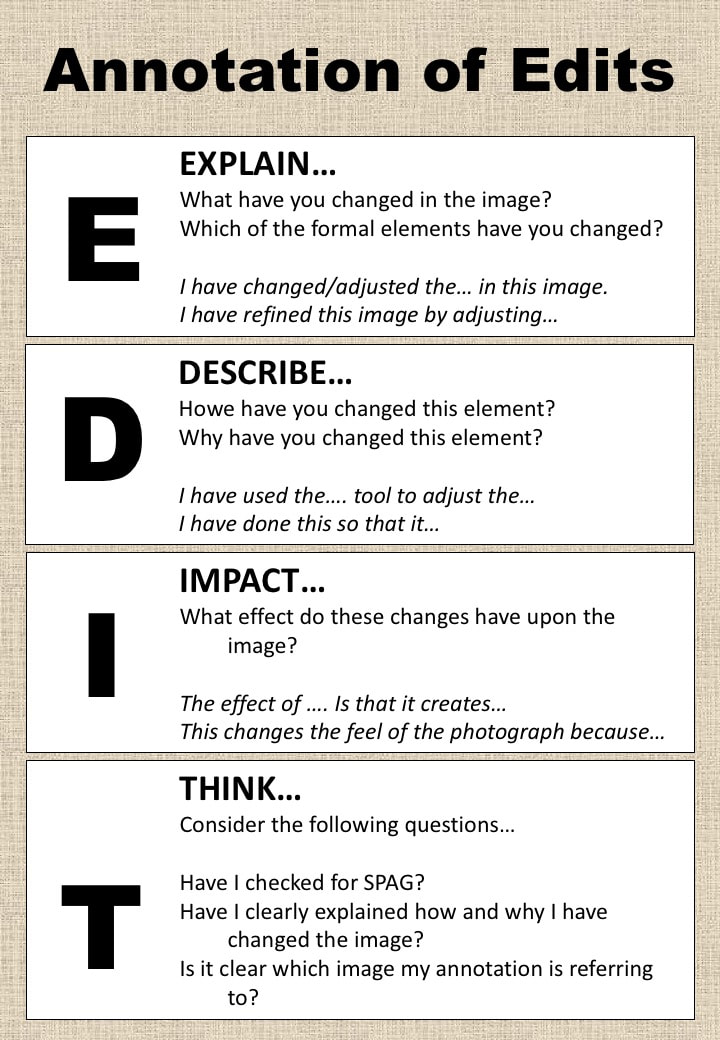
Editing your images (AO2,3&4)...
|

Above is an example of how you EDITS could look...
When you are editing your images you have to make sure that you; Explain; What have you done in order to change the image? Describe; How did you make the changes? Impact; What effect did the changes make to the image? Think: Consider your SPAG and how clearly you have written your annotations. You can edit your images digitally using a programme such as Photoshop or you can be more adventurous and physically manipulate and edit your images. |
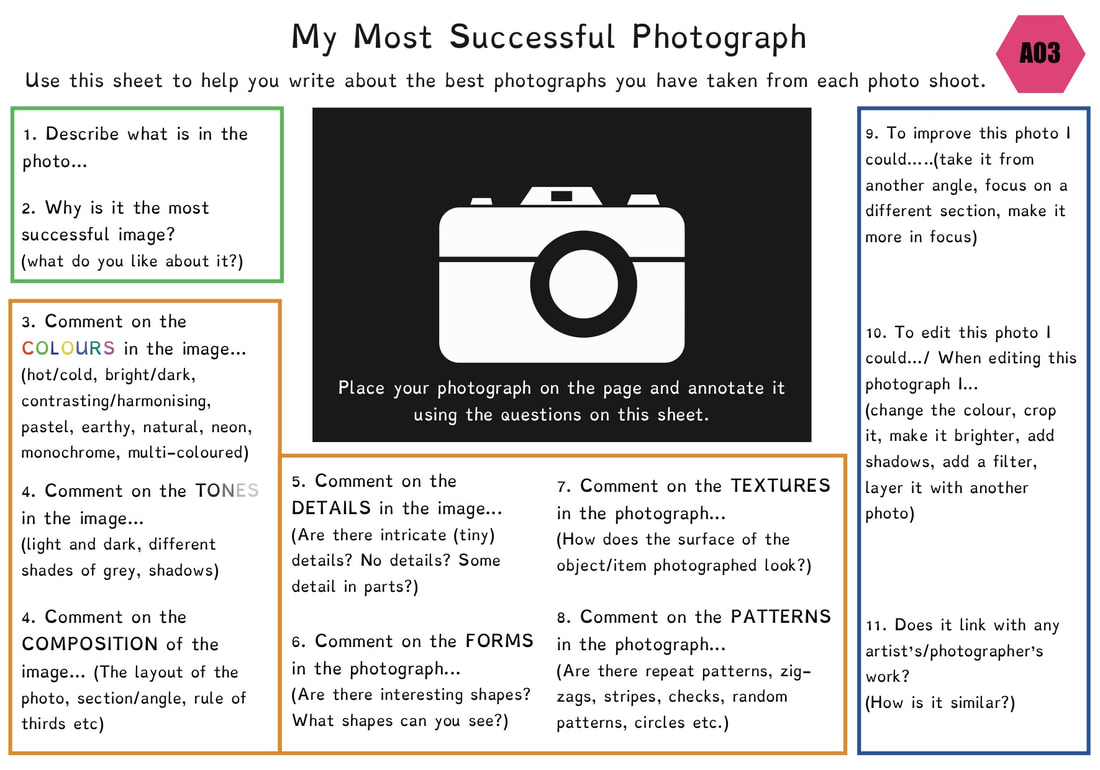
Evaluating your work (AO3)...
After every shoot you are required to evaluate what you have done. Below is a help sheet to support you with this. You Must do all the points in the GREEN and BLUE boxes and then select the most appropriate formal elements from the YELLOW section and do those as well.
The Brief...
For this project you will be introduced to all new ways of doing things, more written work and develop your camera skills!!
Below is your task list, your teacher will let you know when each element is due. Be aware that you must keep up with what is happening in order to fit everything in.
1) Title Page
2) Mind Map
3) Visual Mind Map
4) Experimentation with Fast Shutter Speed including the camera settings (Aperture, Shutter Speed and ISO)
5) Experimentation with Slow Shutter Speed including the camera settings (Aperture, Shutter Speed and ISO)
6) Artist Study Michael Bosanko
7) Plan Shoot
8) Annotated Contact Sheet
9) Edit images (between 2 and 4)
10) Evaluation
11) Artist Study (either Alexey Titarenko or Frank Machalowski)
12) Plan Shoot
13 Annotated Contact Sheet
14) Edit images (between 2 and 4)
15) Evaluation
16) Artist Study (Eadward Muybridge)
17) Plan Shoot
18 Annotated Contact Sheet
19) Edit images (between 2 and 4)
20) Evaluation
21) Choose best results to continue developing and idea
22) Visual Mind Map to show idea for development
23) Plan Shoot
24 Annotated Contact Sheet
25) Edit images (between 2 and 4)
26) Evaluation
27) Plan Shoot
28 Annotated Contact Sheet
29) Edit images (between 2 and 4)
30) Evaluation
31) Final Images, between 4 and 8 must be submitted.